

My entire undergraduate degree was spent learning how to manipulate Microsoft Word and Google Docs to create my assignments. As I progressed in school, I became exceedingly adept at producing papers, presentations, and documents that churned out A+ papers. By the end of my first year I had MLA, APA, and Chicago style templates created so that I wasn’t reinventing the wheel every time a paper was due, which cut my paper writing time into a fraction of what it started off as.
However, every time I had to create something that really looked polished or truly professional, I cringed. While you can use both Word and Docs to create documents (sometimes with ease, sometimes with frustration), it doesn’t create truly professional looking results very often. And now I find myself, in my first term of graduate school, ready to progress onto something that truly takes me from “student” to “professional”.
It’s not like I hadn’t heard “If you need to produce a large document with a TOC and publish to several formats at once, then FrameMaker is the software for you!” But honestly, I have yet to need to publish to more than one medium, nor have I needed to product anything particularly large. And while it’s not been the easiest or most pleasurable of tasks to perform, I have been able to repeatedly produce TOCs in Word for smaller projects and assignments. But when you aim yourself towards tech writing, you become acutely aware that Word isn’t going to cut it.
I’ve just started poking my head into the Tech Writing community and I am hit in the face repeatedly with a particular set of buzzwords. DITA, FrameMaker, and Madcap Flare are repeated often. I found myself excited to be handed the task of creating a software review for one of these products. I thought to myself that by the time I was done I could finally claim some level of competence in the subject I’m attempting to aim myself at. I decided that as I’d done with previous projects, the best way to get comfortable within a software was to install it and to follow a simple instructional video. When I stumble across a YouTube video title “Get Started with Adobe FrameMaker 2017 and DITA” this seemed like a great place to start.
Enter Adobe FrameMaker…

A couple of things to note:
- You can buy the full license for $999USD, get a yearly subscription for $359.88USD/yr, or pay for a yearly subscription monthly for $29.99USD/mo. If you are a teacher or student you can get Educational Pricing and pay $399USD for the license.
- FrameMaker is NOT part of the Adobe Creative Cloud Suite.
- FrameMaker is windows only. This matters to me because I was just considering switching to Mac with my upcoming laptop purchase. This may matter to you, especially if you run Mac. In that case you will have to run a virtual machine setup. Being a longstanding Windows users, I cannot offer any advice on how to do this.
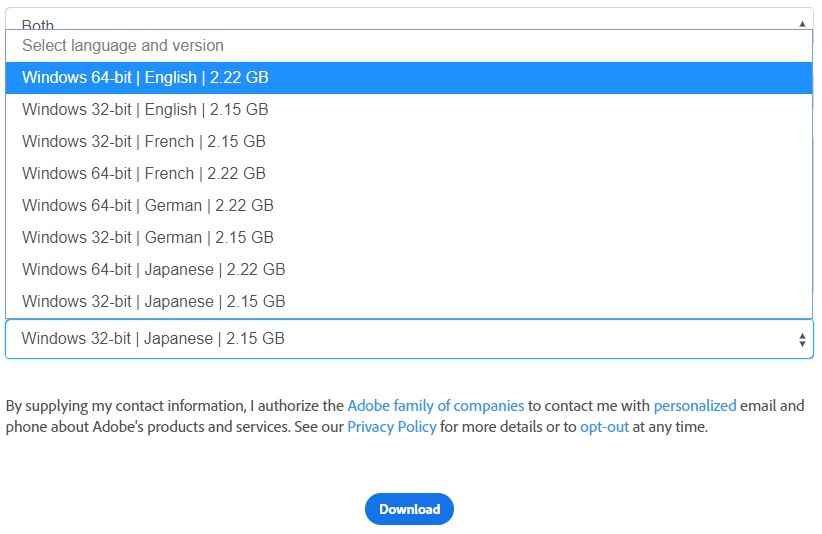
- You will need to know whether your Windows is 32bit or 64bit to install the correct FrameMaker version.
- If you find French, German, or Japanese more comfortable to use, you can download in either of those languages as well.
- Since the start of my academic career I’ve had about 5 ongoing and open Word documents at any given moment on my desktop. One with a sloppy to-do list, and then several with half written ideas for upcoming assignments or projects. When installing FrameMaker it got to 30% and insisted that I save and close Word. Once I did, the install process froze and had to restart it. So, if you are like me, take a moment to close all Word documents pre-installation.
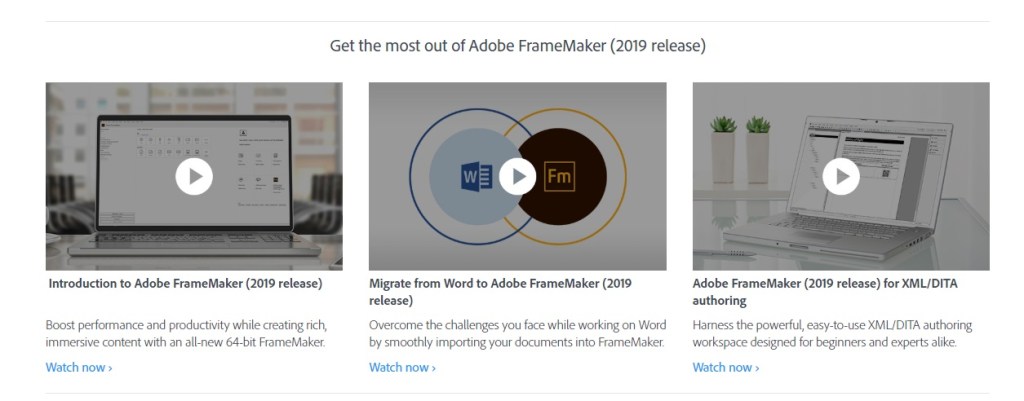
- Adobe offers their own instructional videos. The links are provided when you start the trial download. If you would like to check out those videos, you can find them here: https://www.adobe.com/products/framemaker/resources.html?mv=product&mv2=accc
- The instructional video I’m going to follow is for 2017 FrameMaker. The FrameMaker I’ve installed is 2019. Hopefully this doesn’t cause any confusion or issues.
- The playlist of instructional videos that I am following along with can be found here: https://www.youtube.com/playlist?list=PLdGfUF32cbY3l8xCOMz4ZQeXjKb7tQTQE
- I watched the video on my tablet and followed the tutorial on my laptop. I found this easier than switching back and forth between windows. I realize this isn’t an option for every person, but if you can use a secondary device I highly suggest doing so. I couldn’t use my cell phone because I found the text too small.
- If I discover a functionality or locate something on my own, without tutorial guidance, it will be marked with a big bang. Like this: !
- If I make a mistake, encounter a difficulty, or cannot follow along with the tutorial for some reason or other, it will be marked with a big question mark. Like this: ?
- I seriously have next to no idea what I’m doing! I only know this is software for technical writing and it is supposed to blow my socks off.
So here we go…
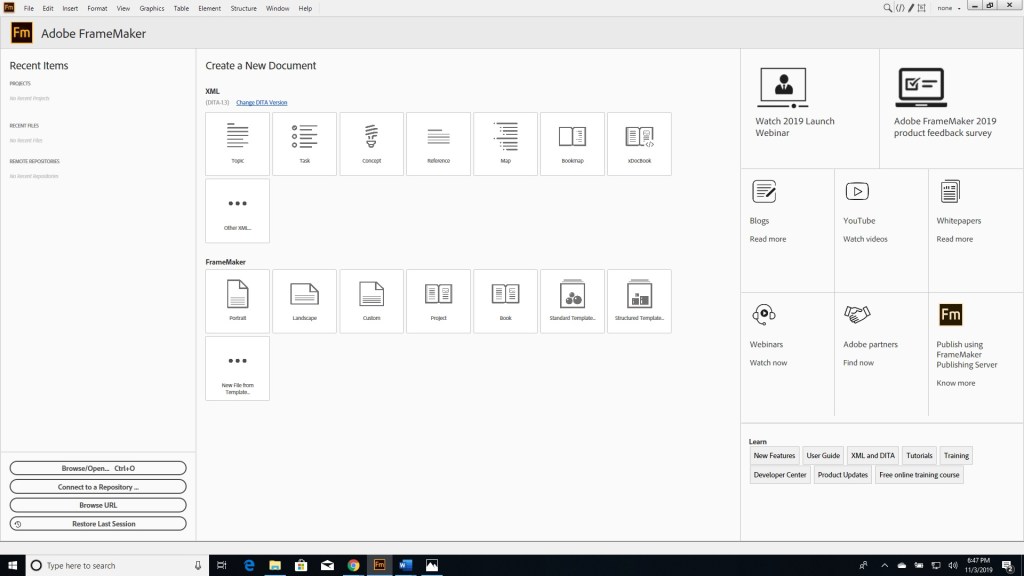
First impression of the software is that it doesn’t seem overly intimidating. Big buttons. Nicely laid out. Nothing seems like it’s written in a language I can’t understand. I like the “Recent Items” area, and comfortable navigation bar at the top. Seems intuitive so far. Let’s start these videos!
Tutorial 1
The first video is incredibly easy to follow. This video shows you how to set up a file system and naming structure to easily save your work, how to make your workspace comfortable for you, and how to navigate the environment to find whatever settings you may be looking for to start. While you don’t initially do much more than create an XML save file, it is enough to get you familiar with the environment and feeling less like a complete n00b.
Tutorial 2
Tutorial 2 runs through some easy document creation concepts. Instead of having you use the document body as the workspace, it familiarizes you with the structure view by having you initially navigate inside that window. It also familiarizes you with “wrapping” text to change the text style. Like for bold or italic text. While this has several ways and places to accomplish this task, I found that my standby ctrl+B and ctrl+I still work here. For that I am thankful, as I have been relying on these same keyboard shortcuts for almost 25 years.
! My copy of FrameMaker didn’t open with Text Symbols turned on. I found this setting myself very easily in View -> Text Symbols.
? I found myself clicking around in the wrong place fairly often. I didn’t find the structure, or how to move around within it, to be very intuitive. This has been the most time consuming part of my learning process so far.
If, like me, you accidentally click on “conbody”, instead of next to it you could accidentally replace that part of the structure with your text. I’m new enough to not understand the full significance of this, but you can’t go on to the next paragraph if you do. You will get your loud Windows chime telling you “Can’t Do THAT!”. If you do that it will look like this:
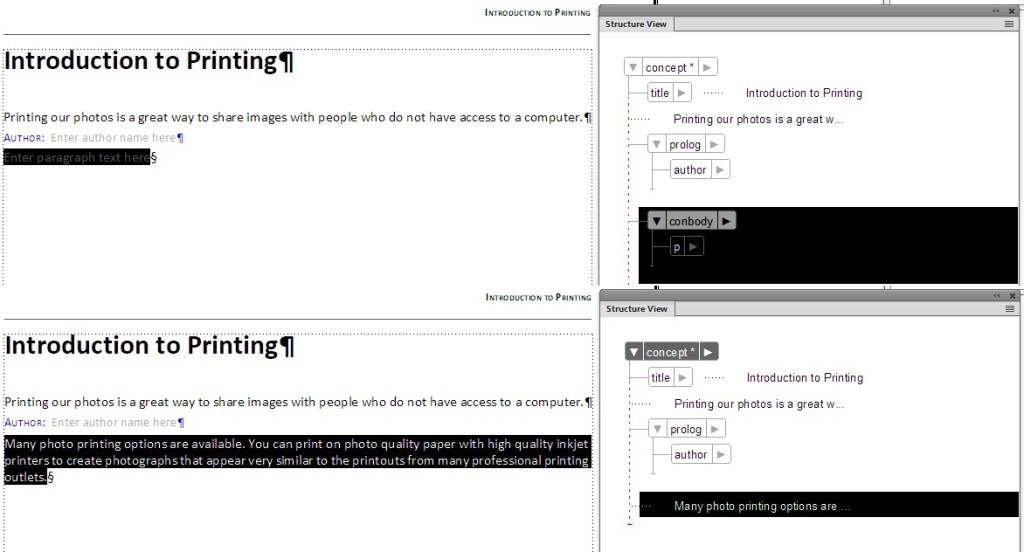
The top half of the image is what it looks like when I select conbody accidentally, the bottom of the image is what it looks like if I put the text there. What you should do is select UNDER the conbody and enter your text there. If done correctly it looks like this:

In the top half of this image I’ve correctly highlighted the paragraph. In the lower half of this image I’ve correctly inserted the text, and then created a new paragraph.
If you want to follow exactly along with the tutorial, be prepared to pause the video depending on your typing speed.
Most of the mistakes I made seemed to hover around bumbling around in the body, expecting things to work like they do in Word. Word this is not. I finished out Video 2, but I felt a little stupid and more than a little lost.
Tutorial 3
Tutorial 3 is a strangely short tutorial. You create a new topic document and insert a title, description, author, and a short paragraph. Then you save your document. While it doesn’t feel like much, I did it without any bumbling around or mistakes. It felt good and fluid.
Tutorial 4
Tutorial 4 is also a short tutorial where you create a concept. It goes as smoothly as the topic document creation and by the end I am starting to feel a lot more comfortable in the environment. But leaves me wondering, what are the differences between concepts, topics, and tasks?
? I had to go research the differences between topics, concepts, and tasks. And what I found out is that FrameMaker’s icons are actually very helpful in understanding what the different DITA documents are meant to do.

! FrameMaker DITA Templates
Topics, per the Oasis website, are the “basic units of DITA content.” A single topic that can be shared and organized. It is a ‘blank’ document, from what I gather. The other categories (task, concept, reference, and map) are all topics, but in specific structures to accurately provide specific kinds of technical information.
Tasks are step by step, bulleted instructionals that guide a user to accomplish a task or goal.
Concepts are used to explain ideas. Information is a descriptive format.
References are used to give detailed information often in a table format.
This was easiest for me to understand as a recipe. You would use the concept area to describe and/or discuss the recipe, you could use a task format to write out the cooking instructions, and the reference format could be used to give the specific ingredient list.
While Tutorial 4 didn’t provide me with this information, without it I wouldn’t have gone to seek the information myself and might not have fully understood the differences for a while longer. I am going to consider that a score. Additionally, as I stated at the start of my software review, I LOVE TEMPLATES. And FrameMaker seems to be a DITA template machine! This is a win in my book. Nobody likes carving out wheels every time they go for a drive.
Tutorial 5
Tutorial 5 is the longest of the tutorials and is a much richer source of information about how powerful FrameMaker is as a DITA authoring tool. A few minutes in and the tutorial is showing how documents can have not only attached authors but intended audiences as well. It really never occurred to me to keep technical data separated by intended audience, but with the projects I have going in my various classes it is suddenly this absolutely brilliant idea that I’ve just never known existed.

In this image you can see that I’ve set the audience to “type=user, job=using, exerperienclevel=novice.” Remembering that DITA was created as a way to create documentation by reusing existing documentation, this completely makes sense to me. I can see how incredibly helpful this could be in reusing pieces of documentation.
The next thing we tackled was adding permissions. From open and freely distributable, to only entitled persons.
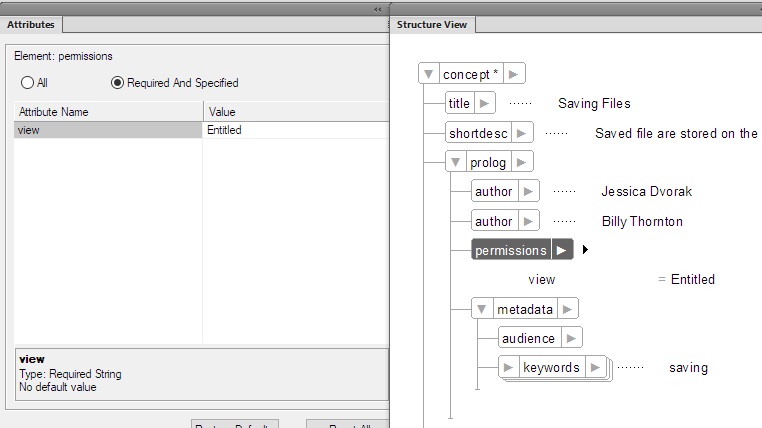
This, once again, makes sense but wasn’t something I knew I needed until I knew it existed.
Now that I have finished the tutorials, I honestly feel like I am in a better position to give an honest review of this software. And I am not sure if I could have honestly understood what it means for technical writers if I wasn’t also learning a bit about DITA as well. I can see the authoring capabilities within FrameMaker, it makes sense to me how this would be helpful to write a book or put together short, one time use deliverable documents. But when you combine it with DITA and you bring to it the capability to tag, search, reference, and reuse documentation you save yourself vast amounts of time and energy. Every document you create from the ground up is a potential template to be used for another document later. Every piece of writing you put time into can save you additional time later.
This software, and the DITA framework, combine to make a technical writer’s secret weapon. Even though it’s not so secret. How have I never known this existed? Why have none of my professors ever shown this to me before? I am excited about my own future documents that have yet to be created!
Now. I just need to save up for the license.
